Table of Contents
- Connect Row Zero to Snowflake
- Write a query to import data
- Build out your connected spreadsheet
- Schedule auto-refresh
- Share connected data
- Export to Snowflake
Connect Row Zero to Snowflake
Row Zero's built-in Snowflake connector makes it easy to connect your spreadsheets to Snowflake using username and password, key-pair authentication, or Snowflake OAuth. Read more here about Snowflake OAuth. To connect with a password or key-pair, continue reading.
Note: Because Snowflake will soon be removing password-only sign-ins, we recommend you connect to Snowflake using Snowflake OAuth. If you need to connect as an individual, without using Snowflake OAuth, then we recommend using key-pair authentication.
To add Snowflake connectivity for people in your organization who do not have their own Snowflake logins, we recommend creating a dedicated SERVICE user in Snowflake for this purpose, then connecting Row Zero using key-pair authentication. Once the connection is created in Row Zero, you can securely share it with the appropriate people in your organization.
In Row Zero, click on the 'Data' icon in the upper right-hand corner and then click the button to 'Add connection.'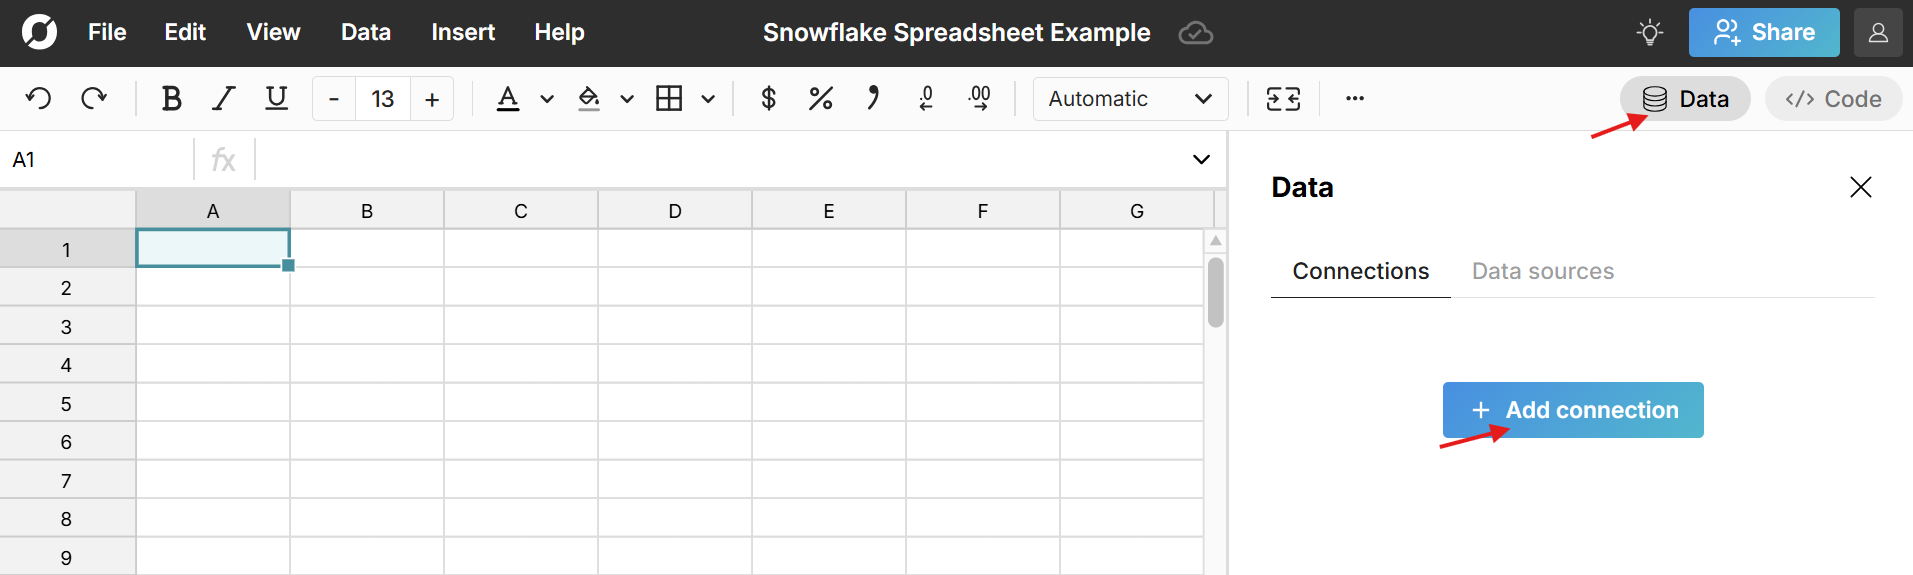
The Snowflake connector requires a few pieces of information defined below.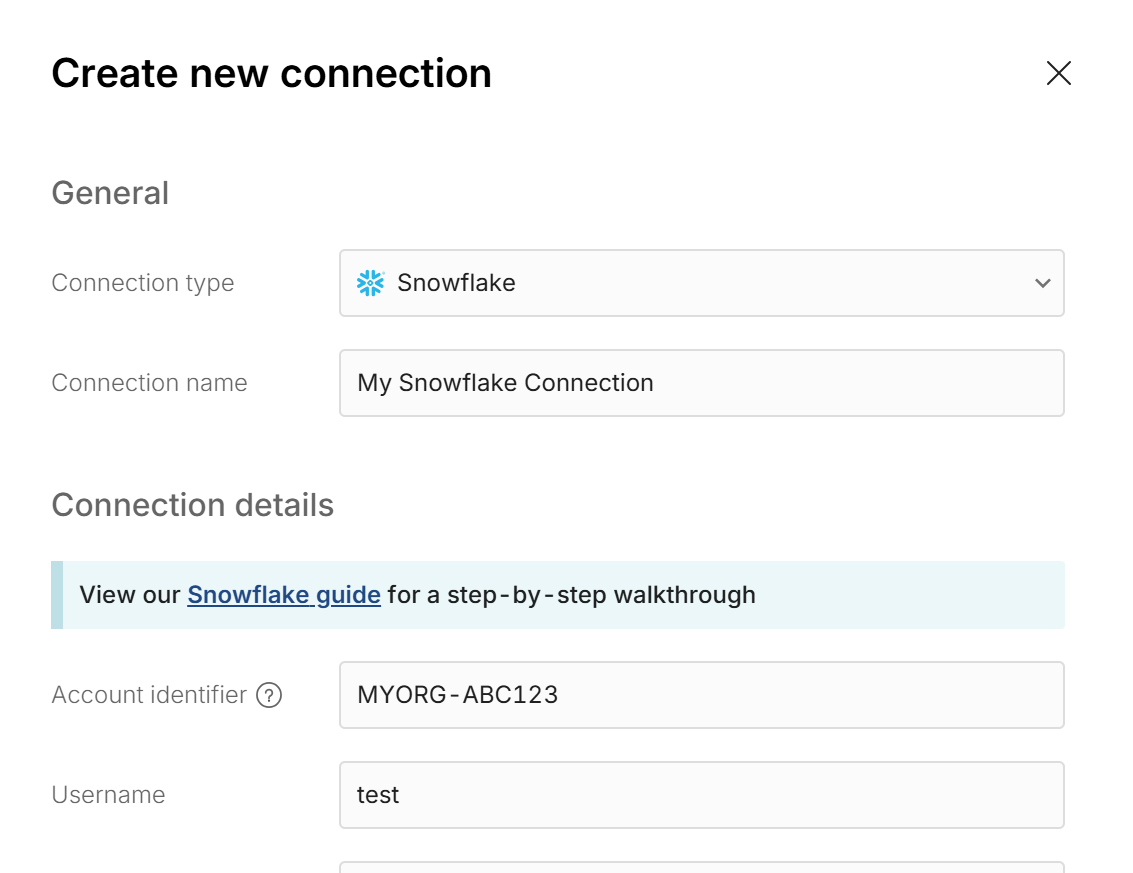
- Connection name - This field can be anything that helps identify the data source being connected. (e.g. "Production Data" or "Product Metrics")
- Account identifier - This is your organization name and account name combined with a hyphen (-). When logged into Snowflake, find them in the URL: https://app.snowflake.com/org_name/account_name. View Snowflake's docs for additional detail.
- Username - The username used to log into your Snowflake account.
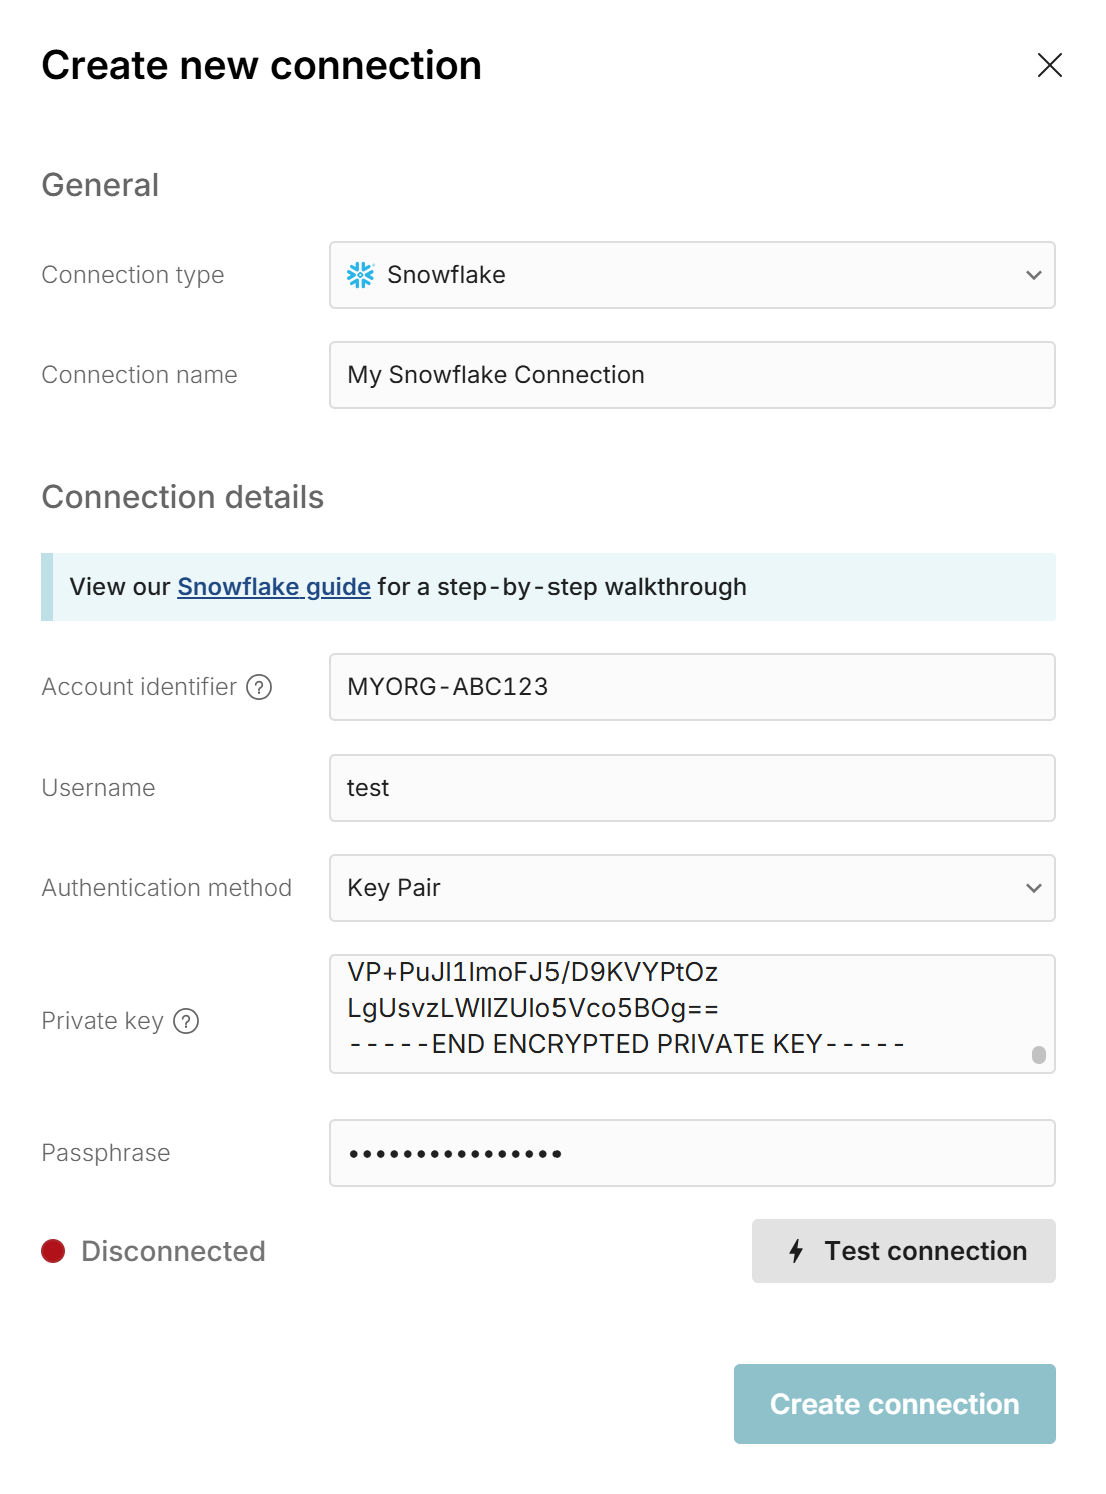
Connect using a key pair
This is the default authentication method. You should see "Key Pair" selected under 'Authentication method'. For help setting up a key pair in Snowflake, read Snowflake's user guide here. Row Zero supports both encrypted and unencrypted private keys.
Paste the contents of private key that you generated when setting up your Snowflake user. The text should be in PEM format. If you generated an encrypted private key, enter the passphrase in the form field under the private key.
Connect using a password
If you still have a legacy Snowflake account that supports password sign in, and you do not want to use key-pair authentication, select 'Password' and enter the password you use to log into your Snowflake account.

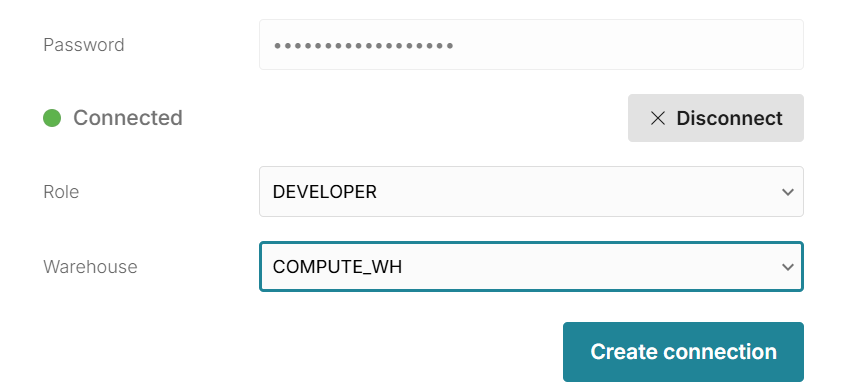
Once all the information is entered, hit 'Test connection' to ensure the information is correct. If the test returns green, you will be asked to select the 'Role' and 'Warehouse' before you can 'Create connection.'
Write a query to import Snowflake data
Now that Snowflake is connected to your spreadsheet, click the "+" sign next to your Snowflake connection to insert a connected table.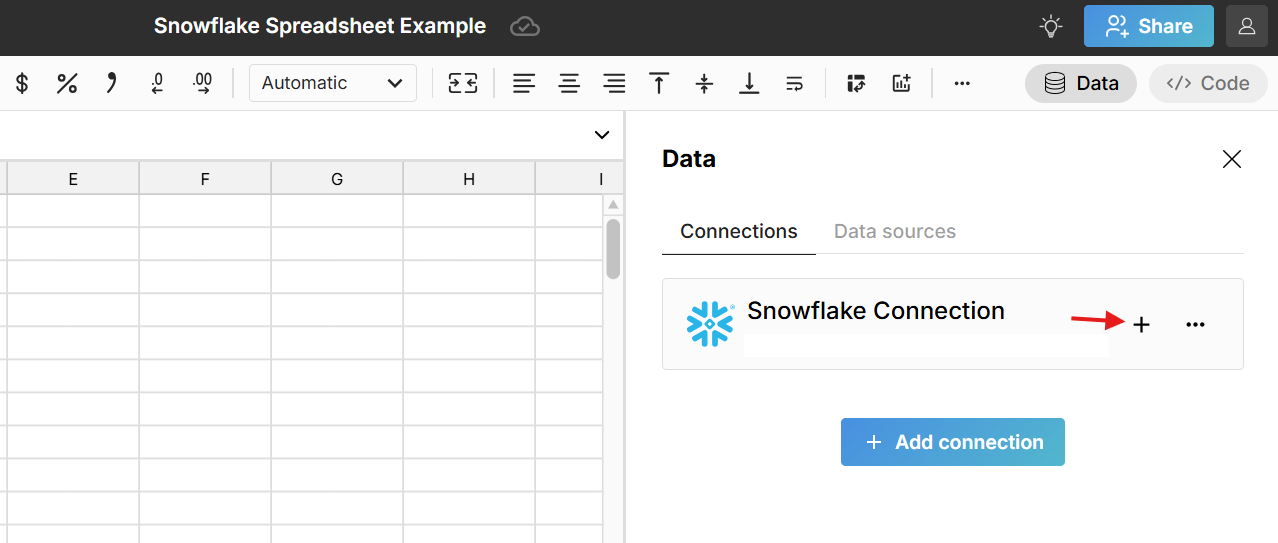 This adds a data table to your spreadsheet that is connected to Snowflake and opens a query editor. Select the 'Database' and 'Schema' from the two drop downs and then write a SQL query. The easiest query to write is a 'select *' statement, which pulls in the entire table. For example:
select * from table_name
Click 'Run' to execute the query and import the queried Snowflake data into your spreadsheet.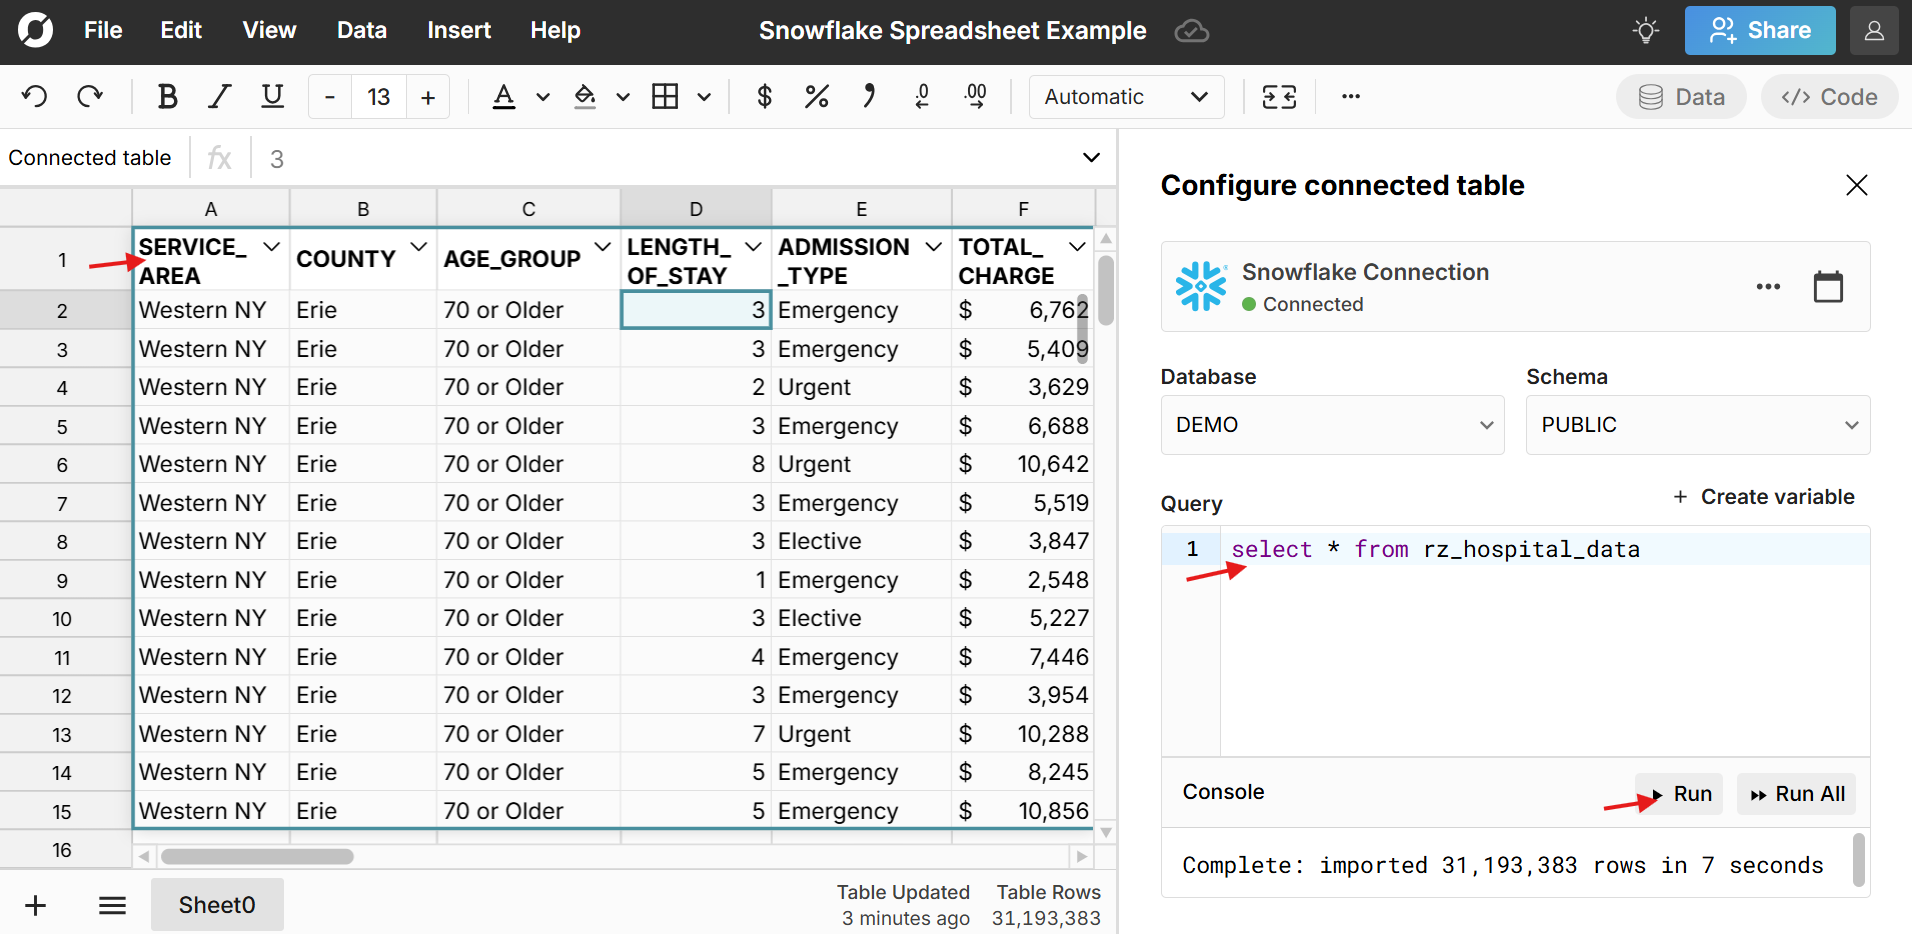 The data imports directly into a connected table in the spreadsheet, which provides a dynamic, condensed view of the data and makes it easy to filter, sort, format, pivot, chart, etc. You can also add calculated columns and reference the data in formula functions throughout your workbook. Double click on the connected table to re-run your query for the latest data or schedule auto-refresh and everything built on connected data automatically updates and stays in sync.
Build out your Snowflake connected spreadsheet
Once you've imported your Snowflake data, you can build out your connected spreadsheet. Row Zero works like Excel and Google Sheets - just a lot more powerful. Connected tables make it easy to view, filter, sort, format, pivot, and chart big datasets.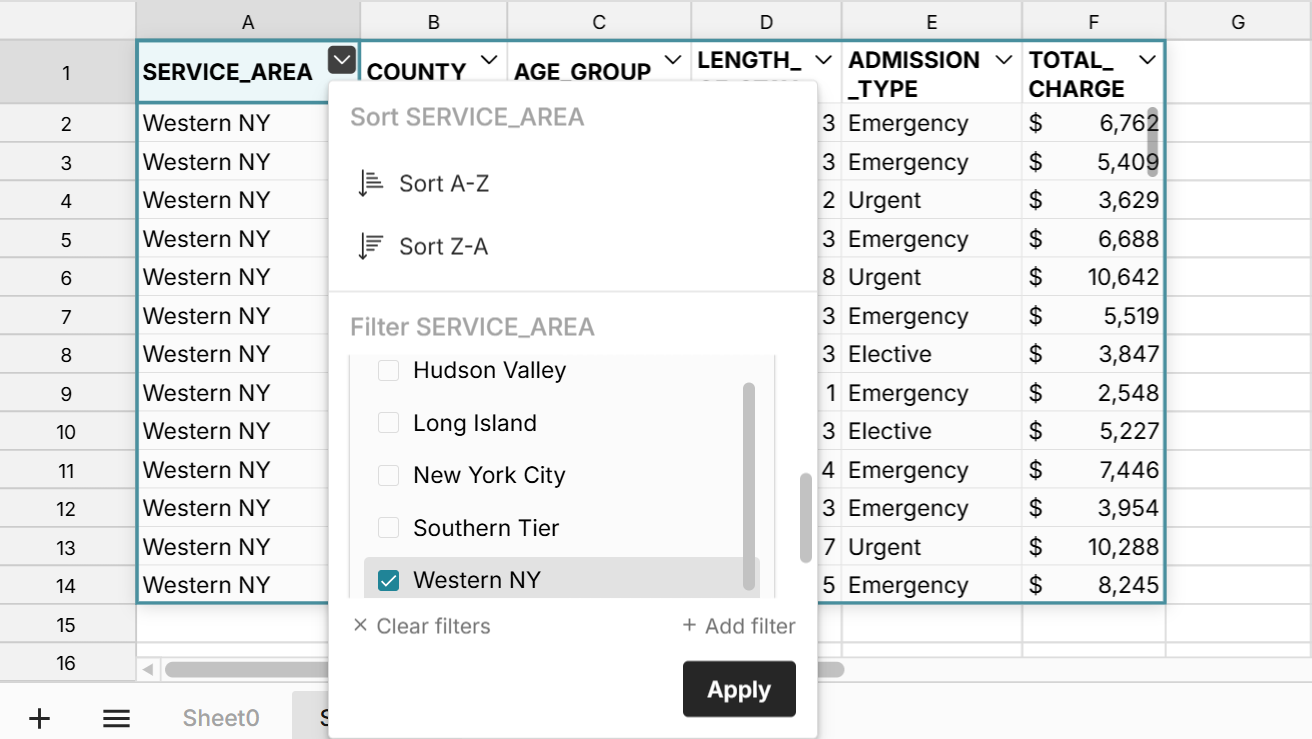 You easily add calculated columns to your table by entering a formula in the first column to the right of your table.
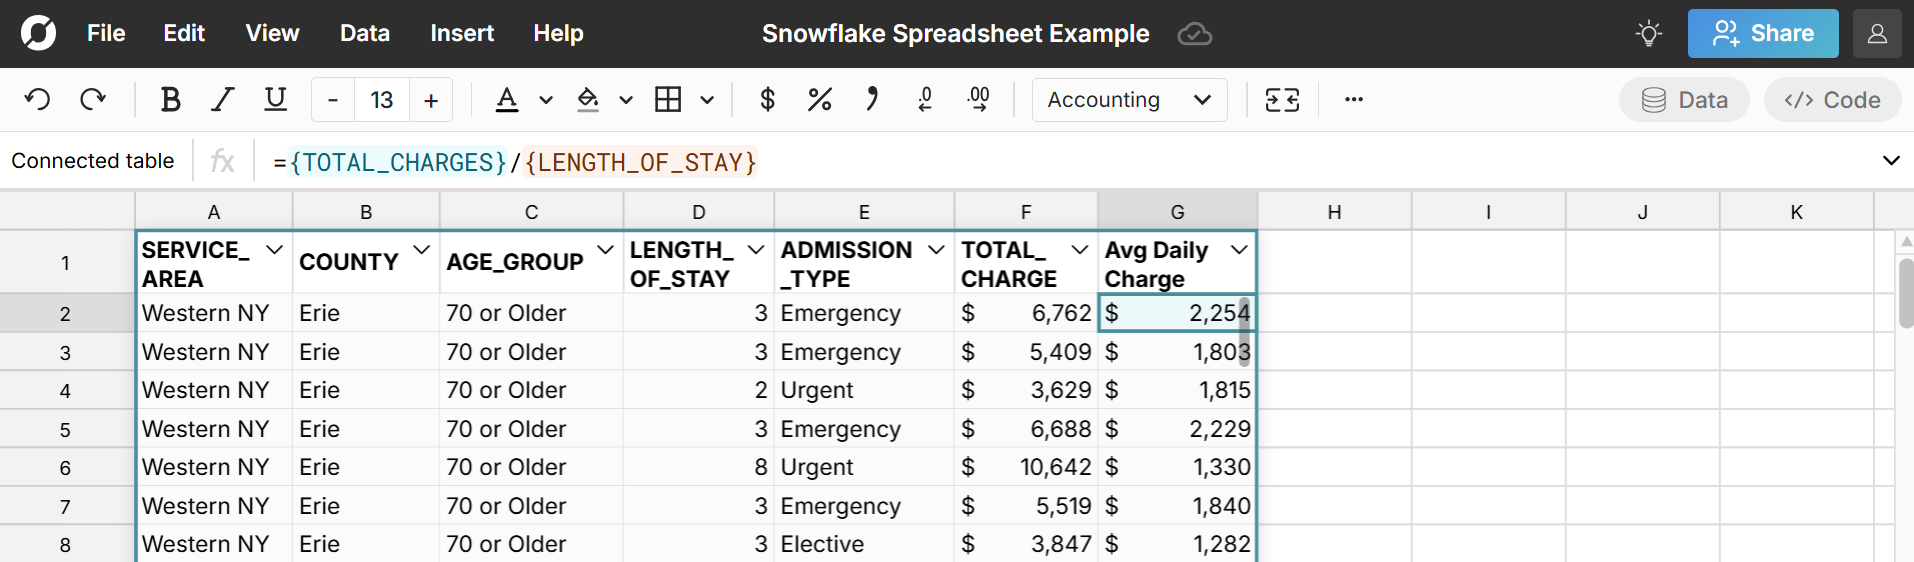 You can also reference the connected data in formula functions throughout your workbook.
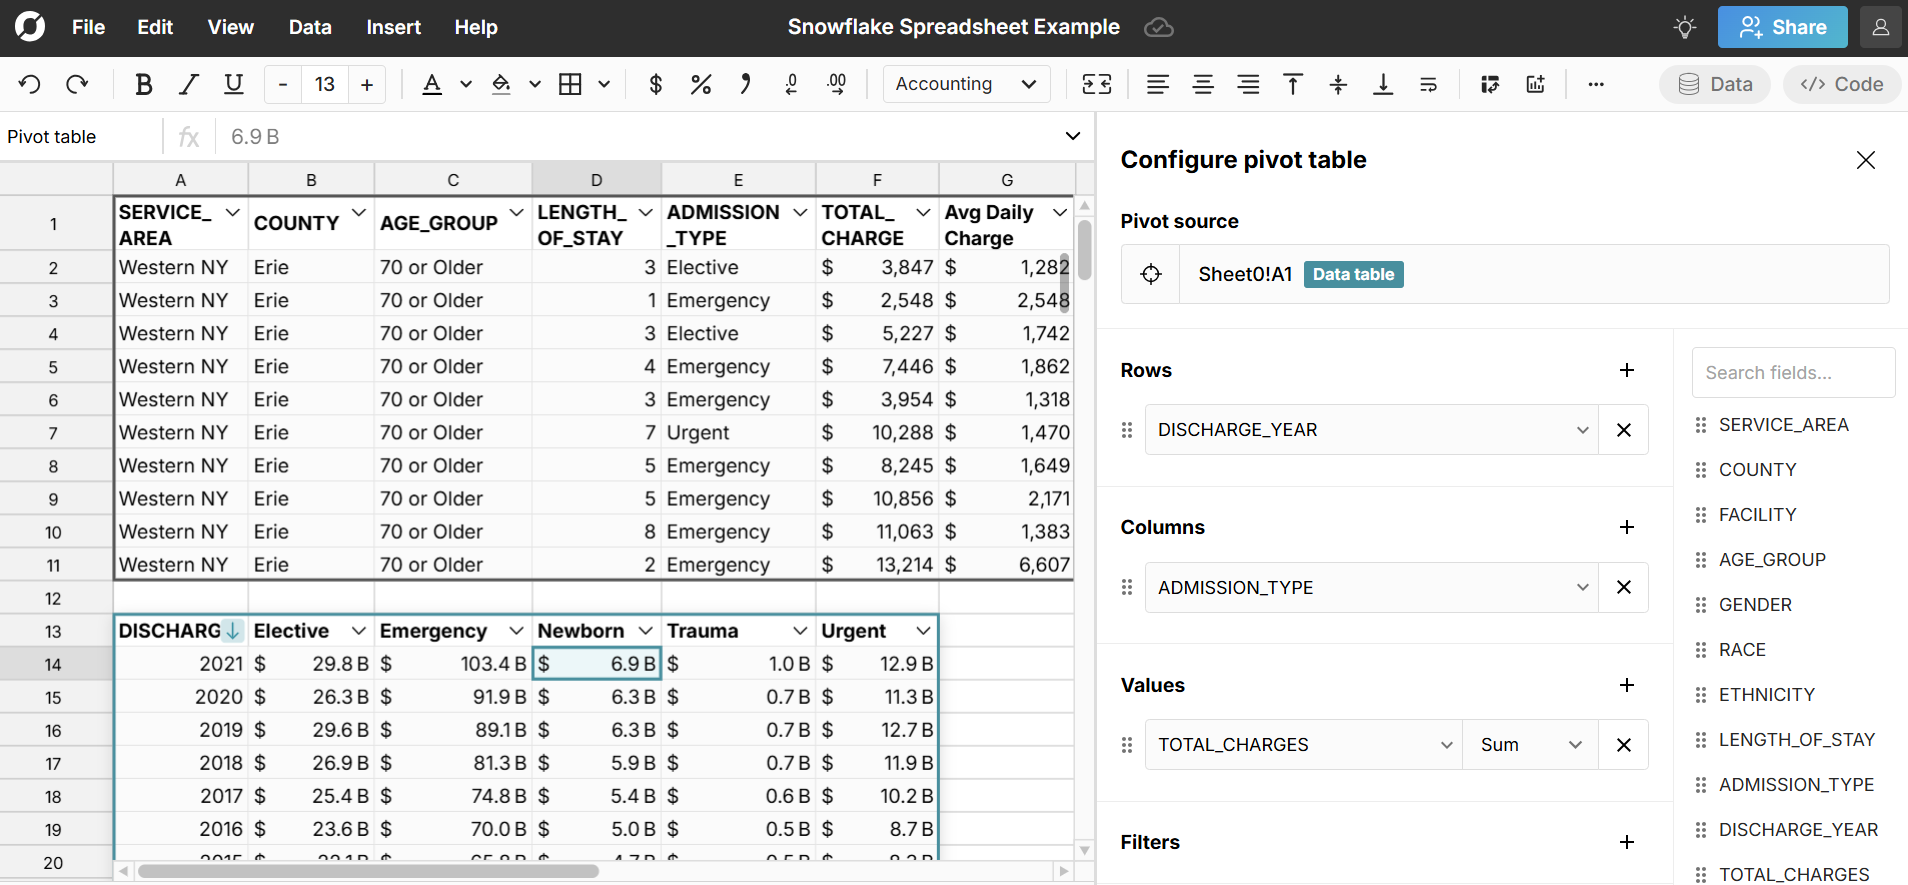
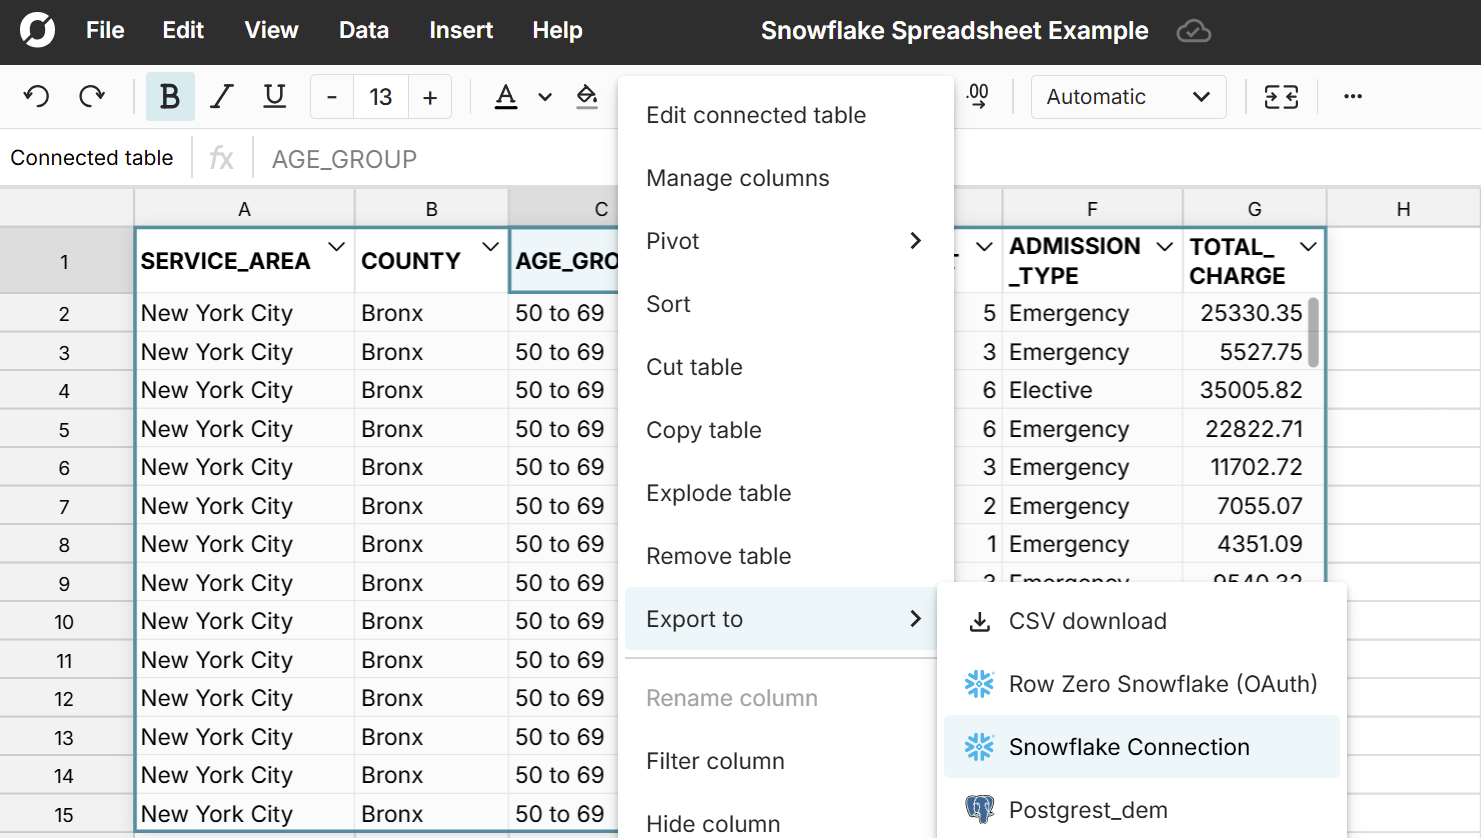
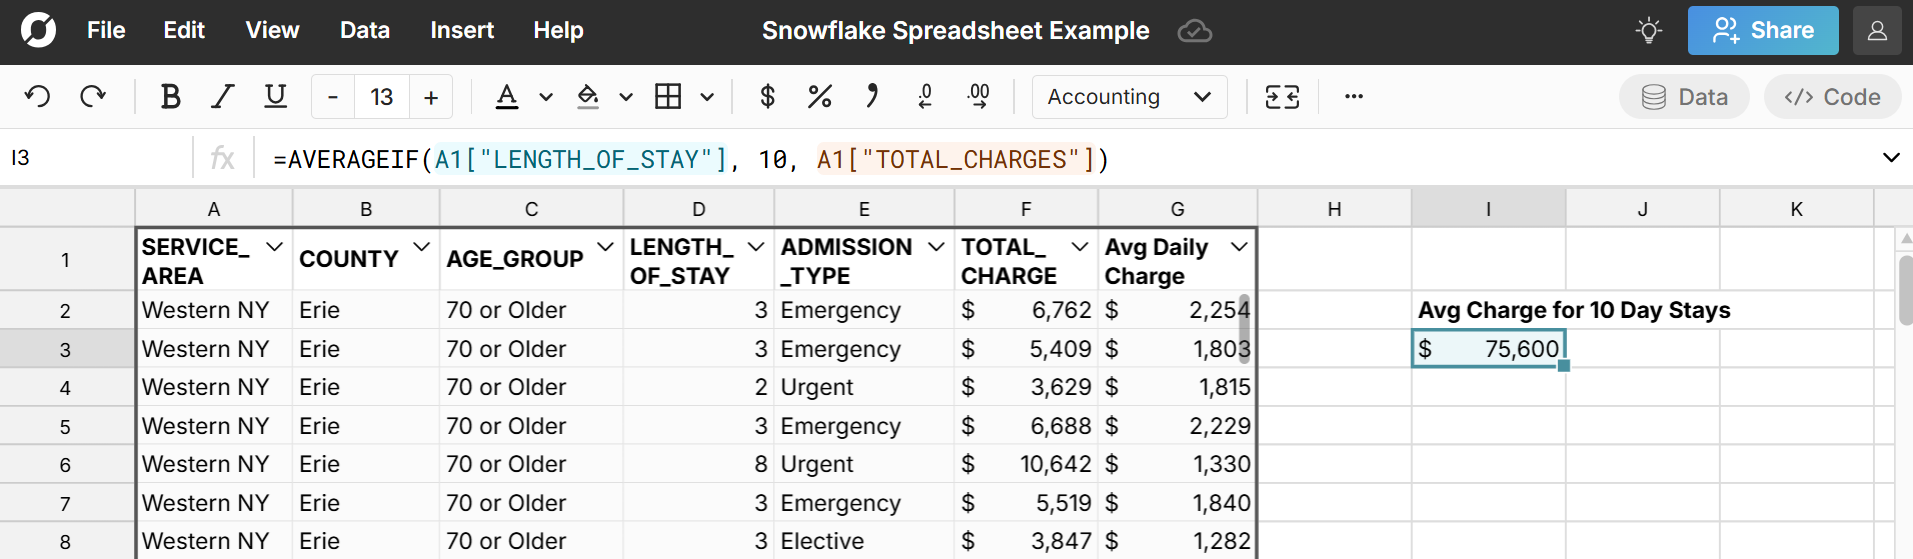 Right-click on the connected table to open a context menu with additional options. You can manage columns, cut, copy, create pivot tables, etc.
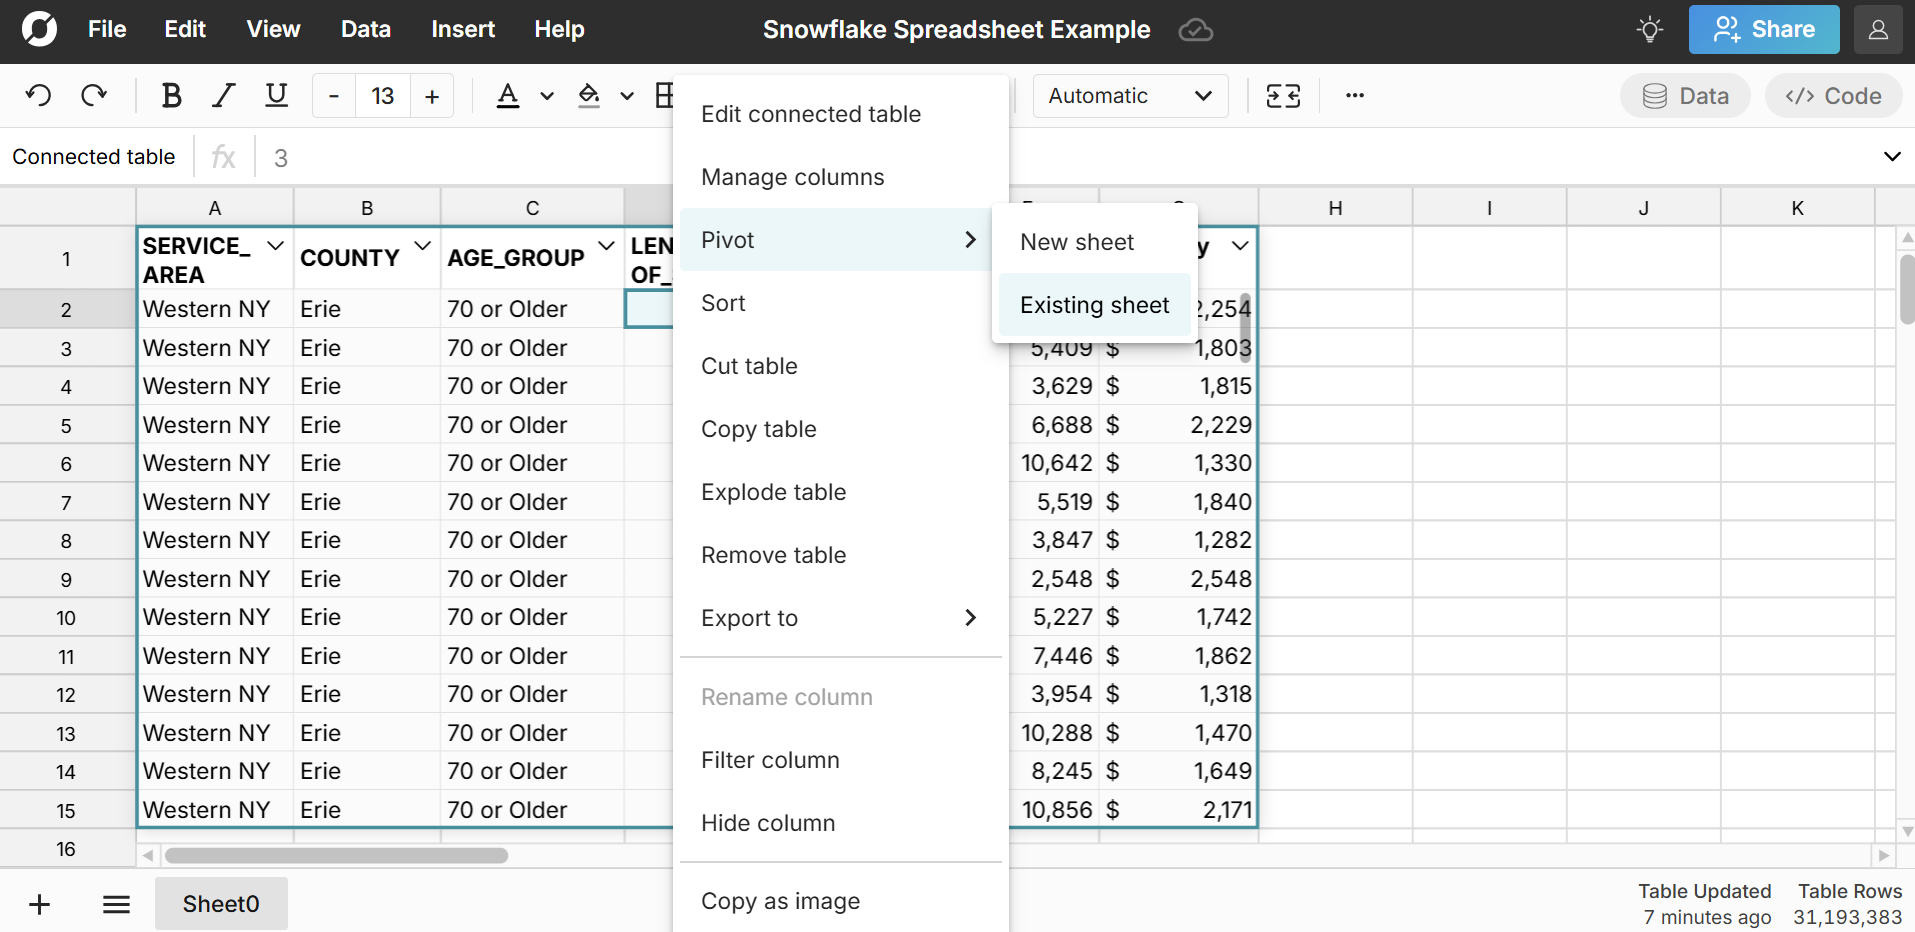
 Easily create connected charts by selecting cells in your connected table or pivot table and going to 'Insert', 'Chart' in the header navigation.
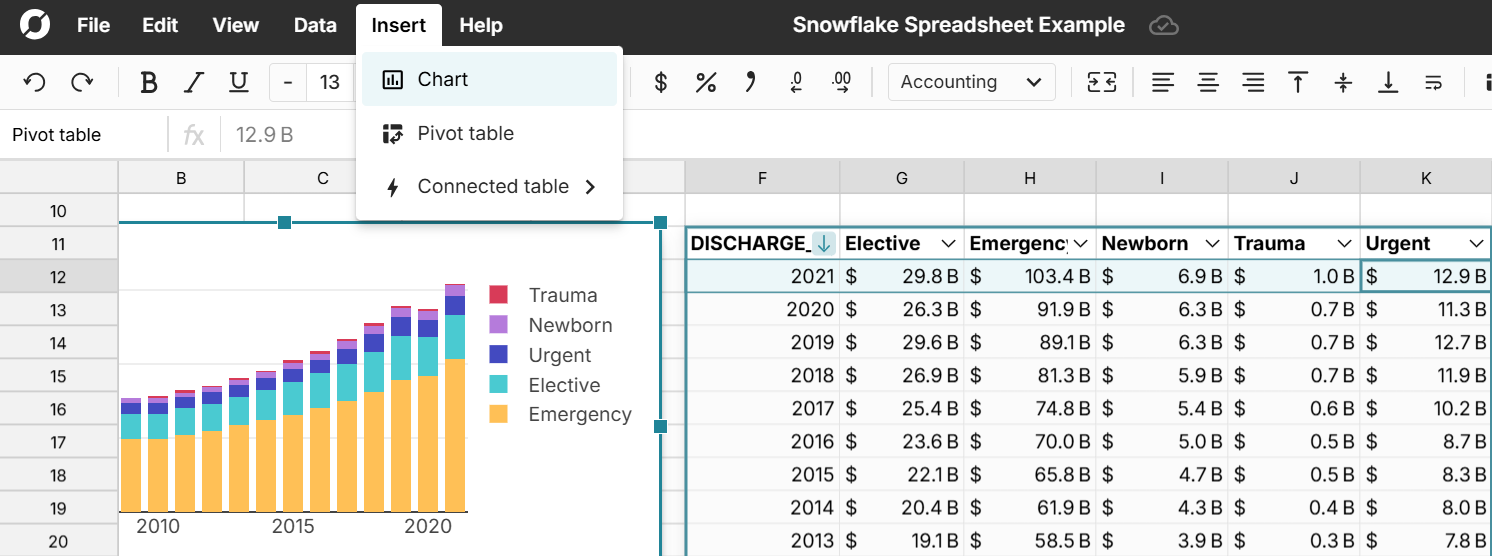 Once you've built out your spreadsheet, you can double-click on the connected table to re-run your Snowflake query for the latest data or schedule auto-updates. This updates everything built on your connected data and keeps your whole spreadsheet in sync with the latest data.
Note, at any point, you can right-click on your connected table and select "Explode table" to expand your data table fully into cells. This allows you to fully edit and delete any cell in the dataset. However, this breaks that data's connection to Snowflake, so you won't be able to re-run your query with new data when exploded.
Schedule auto-refresh
To schedule auto-refresh, double click on your connected table to open the editor and click the calendar icon in the top right. Select 'Refresh daily at' and select your time.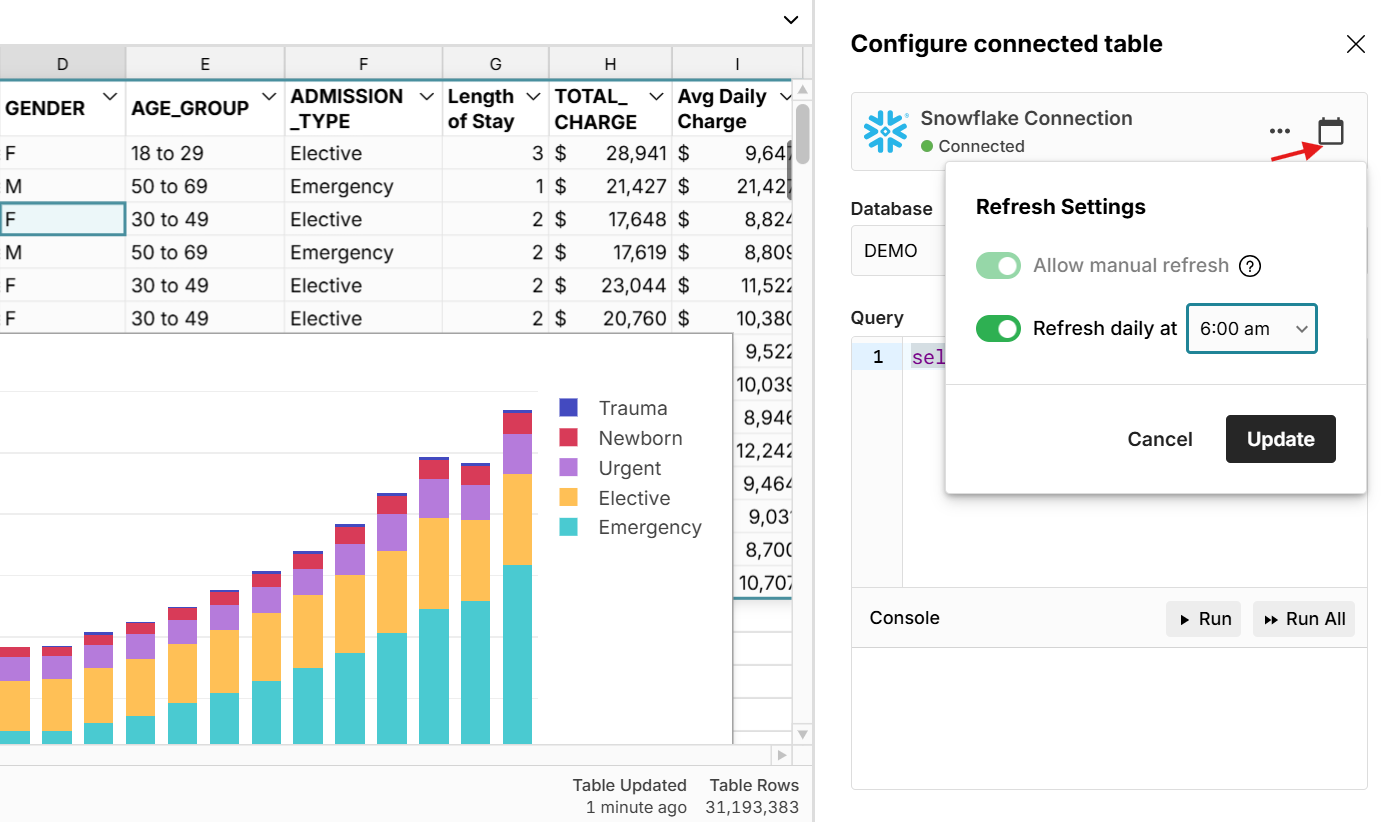 This is an easy way to automate spreadsheet updates. When your source data updates, everything built on your connected table updates automatically. You can also re-run your query at any time to get the latest data.
Share connected data
You have multiple options for sharing Snowflake connected data in Row Zero. Click the blue 'Share' button in the top right of the workbook to share your connected spreadsheet with teammates and collaborate in real-time. You can also publish your Snowflake query as a shared data source to give teammates one-click access to run your Snowflake query in their own spreadsheet. This is an easy way to give non-technical users easy access to governed Snowflake data.
Export your spreadsheet data to Snowflake
With a connected Snowflake account, you can export data sets from Row Zero to your cloud data warehouse. Once you've defined the data you would like to export to Snowflake, right click on the data table or selected range and navigate to 'Export to' and select your Snowflake connection.
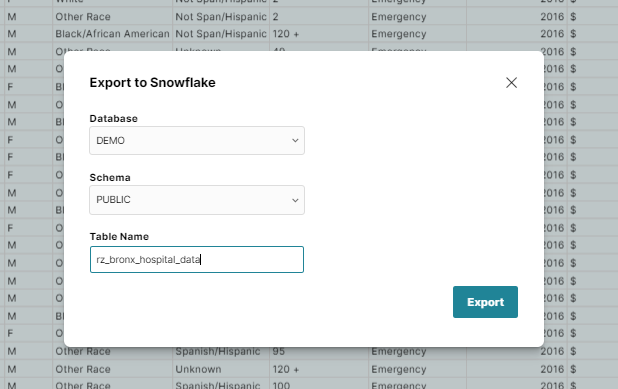
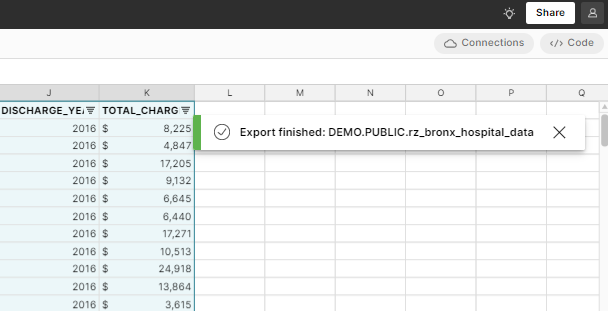
The export to Snowflake modal will pop and ask you to select the database, schema, and specify a table name. New table names are forced to start with 'rz_' to avoid overwriting any tables already in your Snowflake data warehouse. Hit export and Row Zero will create a new table in Snowflake and import all the data. When the export is complete, you will see a notification in the upper right-hand corner.
To verify your table is in Snowflake, you can use either of the commands below.
show tables
select * from rz_TABLENAME
Ready to get started?
Connect to Snowflake and build Snowflake connected spreadsheets that auto-update as source data changes.
Connect to Snowflake